Create First WPF Application by using Grid, StackPanel Containers
We can easily create the WPF application by using Visual Studio. Open Visual Studio -> Create Project-> Select WPF Application
When you create the WPF project by default you have App.xaml, Window1.xaml. App.xaml contains StartupUri attribute which represents start up form and the value is Window1.xaml by default. If you want we can change the start up form by changing the StartupUri attribute in App.xaml form.
In WPF application, we cannot place multiple controls in a window. In WPF window we can place only one control and that is container.
WPF has different containers mainly Grid and Stack panel. By default WPF window contains Grid container.
Grid container is the default container for WPF application and it arranges the elements in user-defined cells, that means we can easily maintain margins between controls.
StackPanel arranges the elements either in vertical orientation or horizontal orientation.
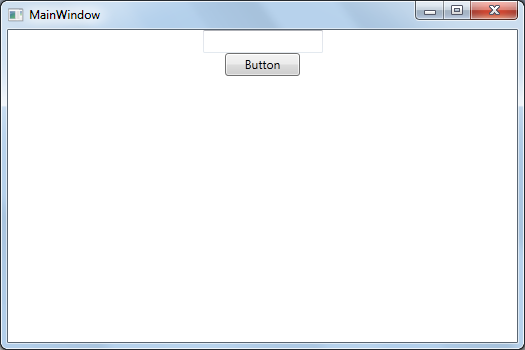
First we arranges the elements by using WPF Grid container as shown below.
<Window x:Class="WpfApplication2.MainWindow"
xmlns="http://schemas.microsoft.com/winfx/2006/xaml/presentation"
xmlns:x="http://schemas.microsoft.com/winfx/2006/xaml"
Title="MainWindow" Height="350" Width="525">
<Grid>
<Button Content="Button" Height="23" HorizontalAlignment="Left" Margin="140,114,0,0" Name="button1" VerticalAlignment="Top" Width="75" />
<TextBox Height="23" HorizontalAlignment="Left" Margin="74,66,0,0" Name="textBox1" VerticalAlignment="Top" Width="120" />
</Grid>
</Window>
The output of the Grid container is as shown below.
Now arrange the elements by using WPF StackPanel container as shown below.
<Window x:Class="WpfApplication2.MainWindow"
xmlns="http://schemas.microsoft.com/winfx/2006/xaml/presentation"
xmlns:x="http://schemas.microsoft.com/winfx/2006/xaml"
Title="MainWindow" Height="350" Width="525">
<StackPanel Orientation="Horizontal">
<TextBox Height="23" Name="textBox1" Width="120" />
<Button Content="Button" Height="23" Name="button1" Width="75" />
</StackPanel>
</Window>
As shown above StackPanel has Orientation attribute, we can assign Horizontal or Vertical for Orientation attribute. The output when using StackPanel Horizontal orientation is shown below.

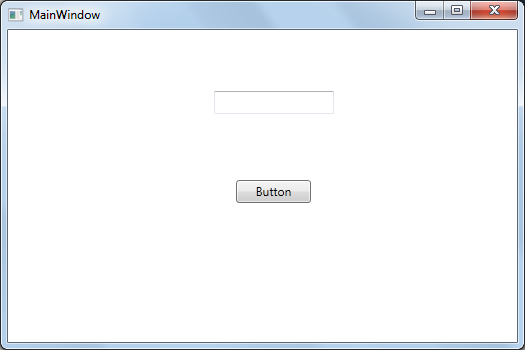
Use Vertical Orientation for StackPanel and the output is shown below.
<Window x:Class="WpfApplication2.MainWindow"
xmlns="http://schemas.microsoft.com/winfx/2006/xaml/presentation"
xmlns:x="http://schemas.microsoft.com/winfx/2006/xaml"
Title="MainWindow" Height="350" Width="525">
<StackPanel Orientation="Vertical">
<TextBox Height="23" Name="textBox1" Width="120" />
<Button Content="Button" Height="23" Name="button1" Width="75" />
</StackPanel>
</Window>