Run background tasks with App Service WebJobs in Azure
In our previous article, we discuss how to create Asp.Net Core web application and how to deploy in Azure App Service. In our web application, to run some of the tasks don’t require user interaction. Through App Service WebJobs we can run these tasks in background without interfering the user interface. WebJobs are available only in an App Service Windows and not available in an App Service Linux platform.
Let’s discuss about App Service WebJobs with console application. In one of my previous article we discuss about how to Update the file in Azure Blob Storage, today also we will consider the same example. Open Microsoft Visual Studio 2019, create console application and name it as AppServiceWebJobs. Install WindowsAzure.Storage package through NuGet and add below code.
class Program
{
        static void Main(string[] args)
        {
            string storageAccntConnection = "please enter your storage account connection string here";
            string blobFileName = @"blobTestFile.txt";

            var storageAccnt = CloudStorageAccount.Parse(storageAccntConnection);

            var blobClient = storageAccnt.CreateCloudBlobClient();

            var container = blobClient.GetContainerReference("techblobcontainer");

            container.CreateIfNotExists(); //create techblobcontainer if it's not exists

            var blob = container.GetBlockBlobReference(blobFileName);

            using (MemoryStream ms = new MemoryStream())
            {
                blob.DownloadToStream(ms);
                byte[] timeBytes= Encoding.UTF8.GetBytes(DateTime.Now.ToString() + Environment.NewLine);
                ms.Write(timeBytes, 0, timeBytes.Length);
                ms.Position = 0;
                blob.UploadFromStream(ms);
            }
        }
}
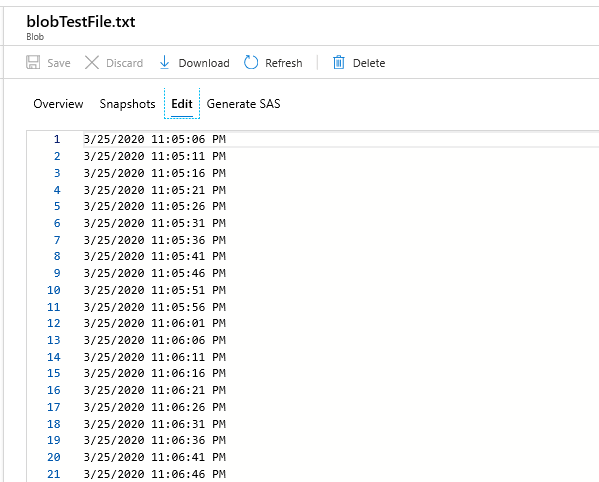
As shown above, we are updating the file blobTestFile.txt in techblobcontainer container blob storage with current date time. Build the application and zip the debug folder.
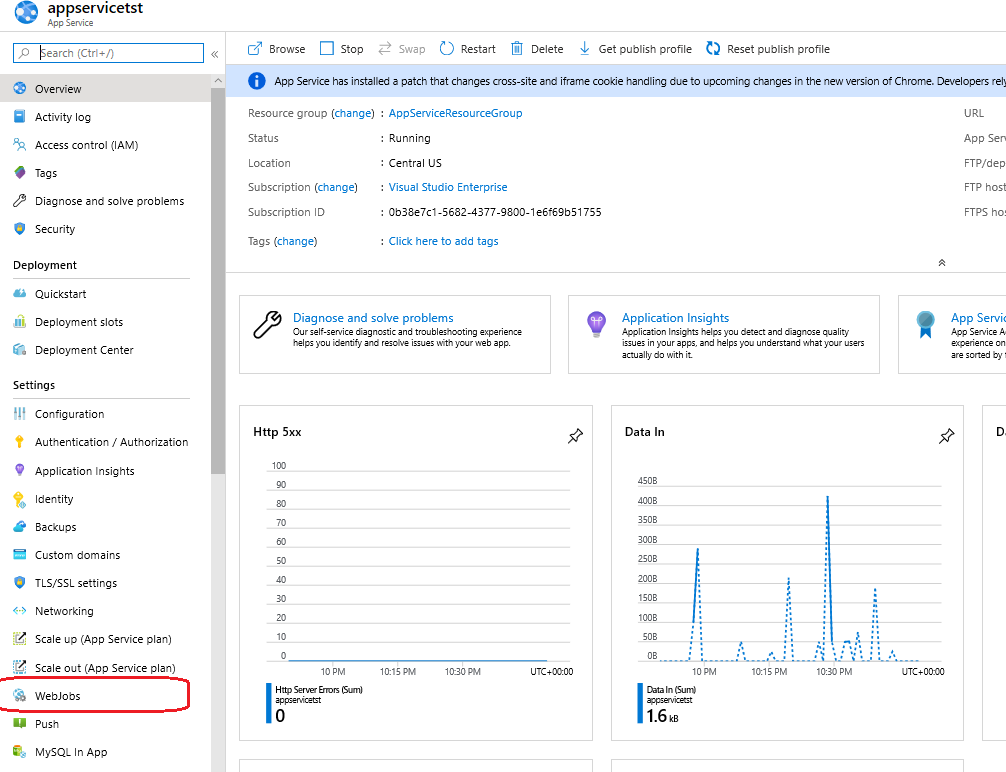
Now create WebJob, go to Azure portal and select your App Service. Here I have App Service named as “appservicetst”.
On left side blade, select WebJobs under Settings to create new WebJob in “appservicetst” App Service.
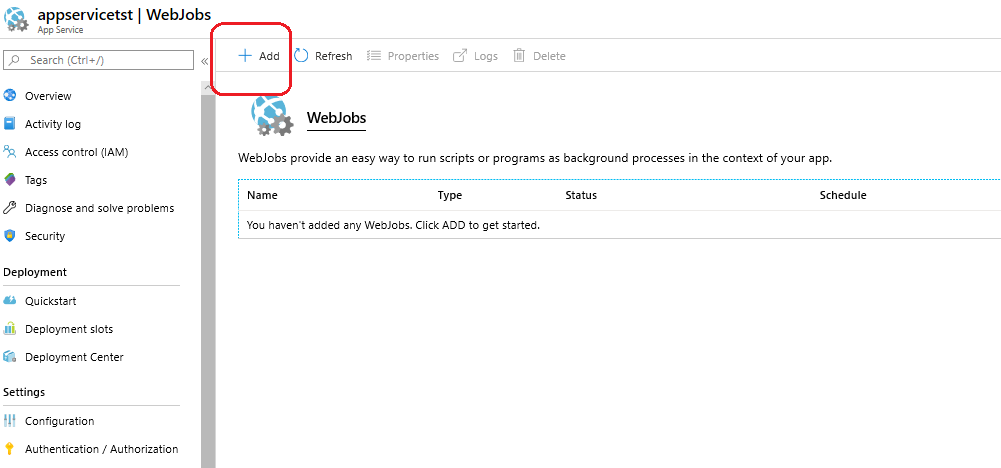
As of now we don’t have any webjobs available in this App Service. Click on Add button to create new WebJob.
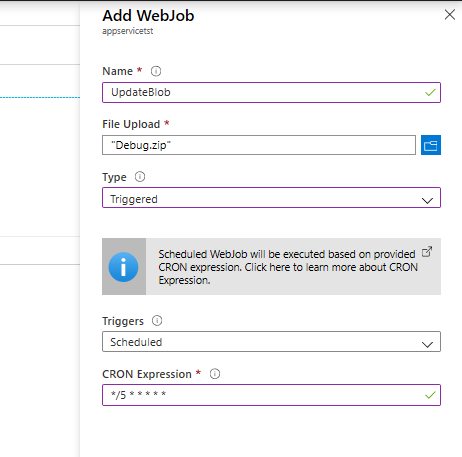
Name: Enter name of the WebJob, here I have entered it as “UpdateBlob”
File Upload: Upload the debug zip file Debug.Zip which you created from the above console application by clicking on File Upload button.
Type: Select “Triggered”. “Continuous” option is for continuous execution and through Triggered option task will get executed on specific intervals or by triggering something.
Triggers: Select Scheduled, here we will write the data to file for every 5 seconds.
CRON Expression: Through this expression, we can schedule the interval between runs. CRON expression basically in the form of “{second} {minute} {hour} {day} {month} {day of the week}”. Here we are running the task for every 5 seconds, so the expression will be “*/5 * * * * *”.
Once you enter the all details, please select “OK” to create the WebJob.
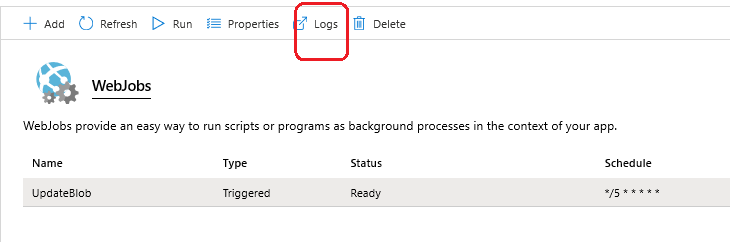
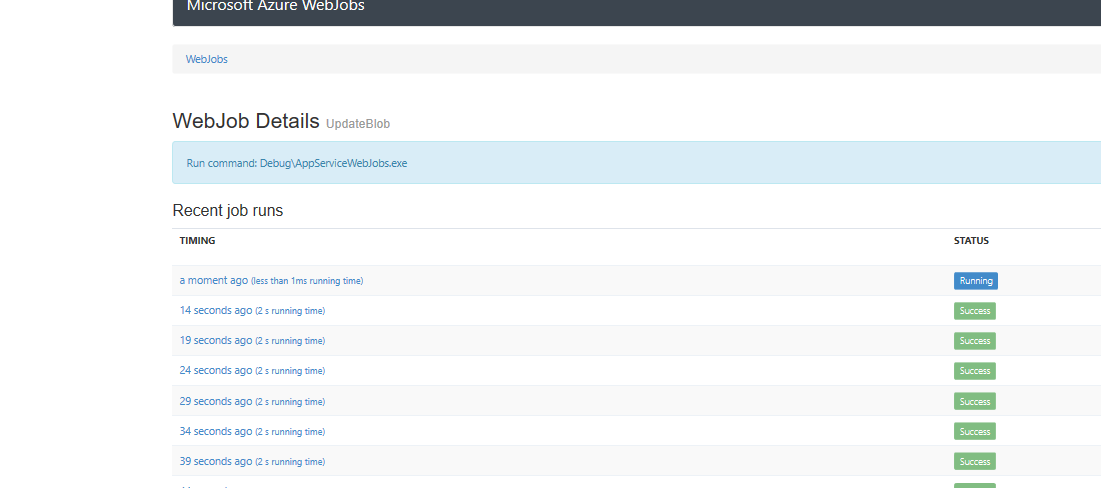
We can check the executed times by selecting the Logs option and it displays the log information as shown below.
Now go to the blob storage and check blobTestFile.txt file content in the techblobcontainer container.