Swagger UI on Asp.Net Web API for Help Pages
Without providing the proper documentation for Rest API, it is challenging for clients to know what type of methods that API provides and what inputs need provide to call the API methods. Through Swagger UI, we can provide the documentation of a particular Asp.Net Web API. In this article, we discuss how to deploy the Swagger in Asp.net Web API project and how to provide the API documentation to the client.
Open Asp.Net Web API solution. Before proceeding with Swagger, first, add XML comments to each and every API method and properties like below.
        /// <summary>
        /// Get all employees
        /// </summary>
        /// <returns></returns>
        // GET: Employees
        [Route("api/employees/getemployees")]
        [HttpGet]
        public HttpResponseMessage GetEmployees()
        {
            try
            {
                return Request.CreateResponse(HttpStatusCode.OK, Company.GetEmployees());
            }
            catch (Exception ex)
            {
                return Request.CreateResponse(HttpStatusCode.InternalServerError, ex);
            }
        }
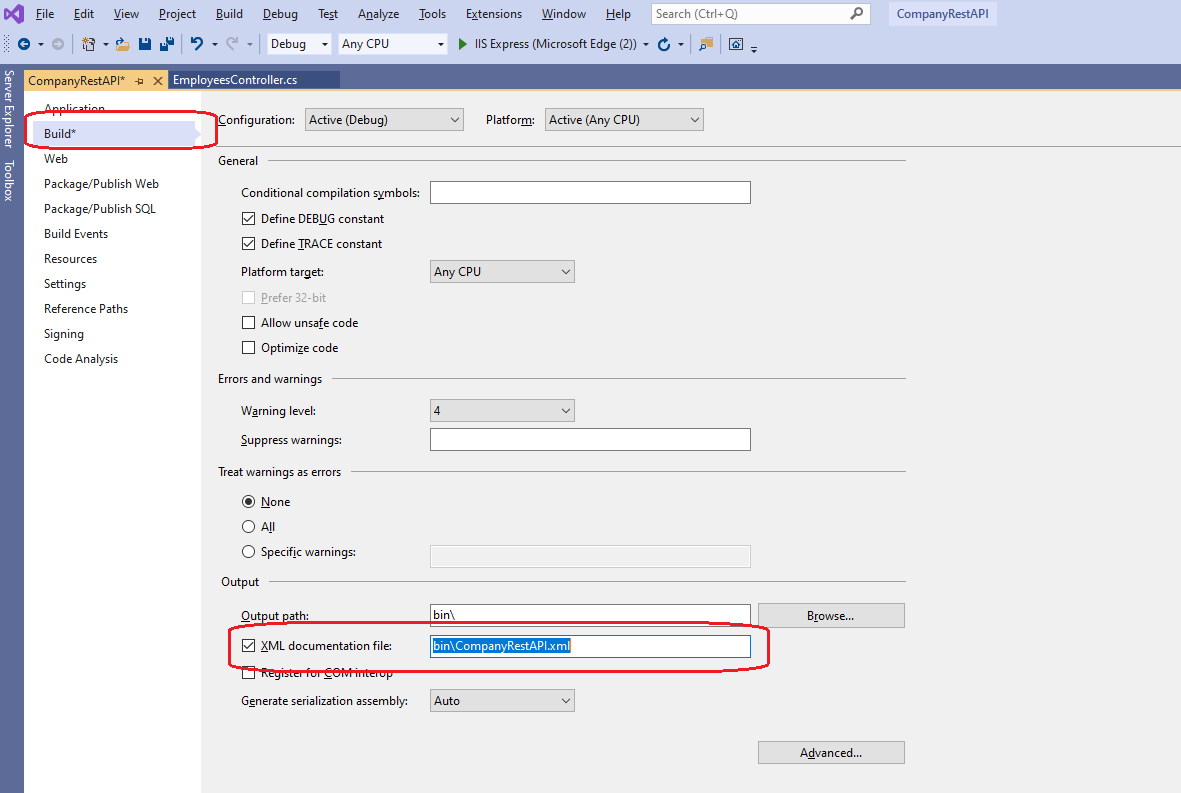
Enable the XML documentation by right-clicking on the project in solution explorer and select properties. Under Build, enable “XML documentation file” checkbox, as shown below. Please remember the XML documentation file path; here it is bin\CompanyRestAPI.xml
Now install Swagger on Asp.Net Web API. To install Swagger, select Tools => NuGet Package Manager => select Package Manager Console.
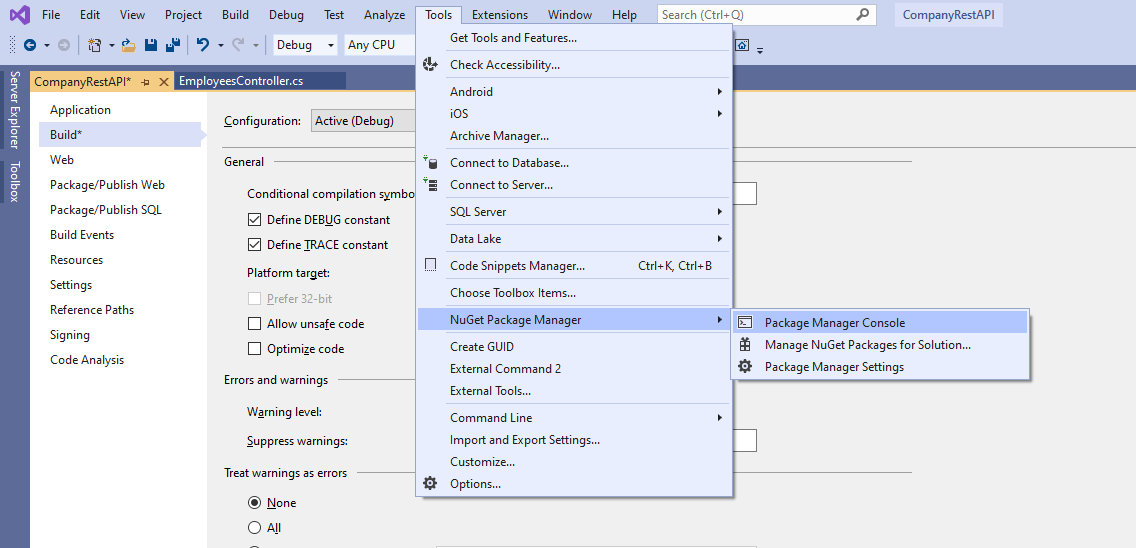
Execute the “Install-Package Swashbuckle” command in Package Manager Console to install Swagger. It installs Swashbuckle & Swashbuckle.Core packages, these packages are required for Swagger UI.
Swagger installation adds the SwaggerConfig.cs file to the App_Start folder. Add the API description and XML documentation file for configuration like below in the SwaggerConfig.Register() method.
c.SingleApiVersion("v1", "CompanyRestAPI").Description("This is example for Asp.Net Web API");
c.IncludeXmlComments(string.Format(@"{0}\bin\CompanyRestAPI.xml", System.AppDomain.CurrentDomain.BaseDirectory));
Run the application and change URL to https://localhost:44358/swagger (http(s)://localhost:port/swagger) which displays the Swagger UI as shown below.
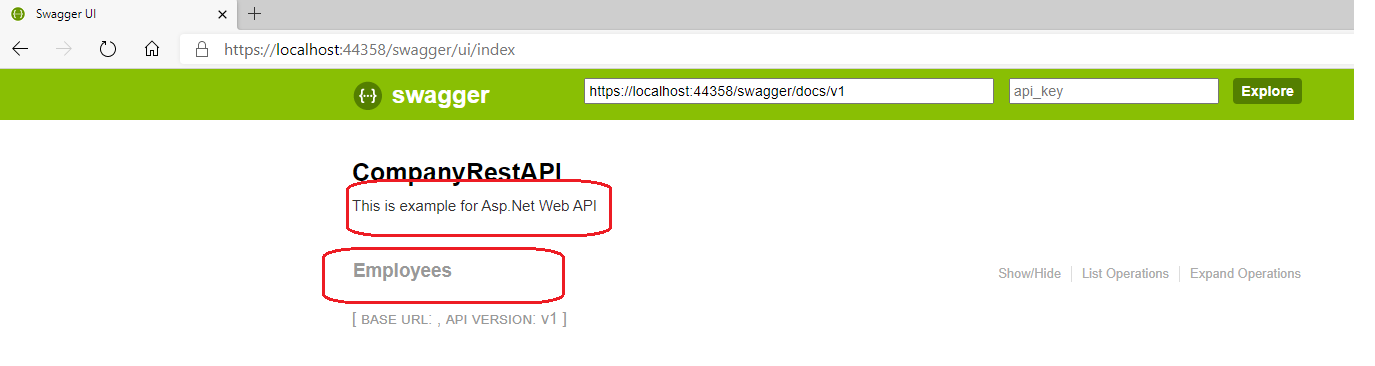
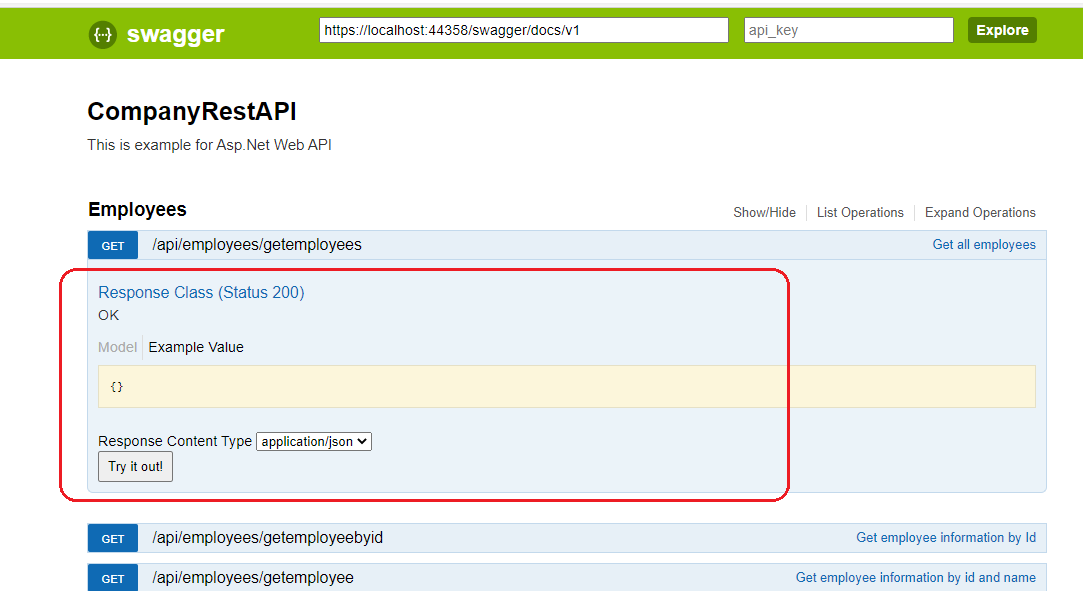
You can find the API description, which we added in the SwaggerConfig.cs file. Employees is the controller in the API; here, we have only one controller. If you click on the Employees controller, it displays all its API methods, as shown below.
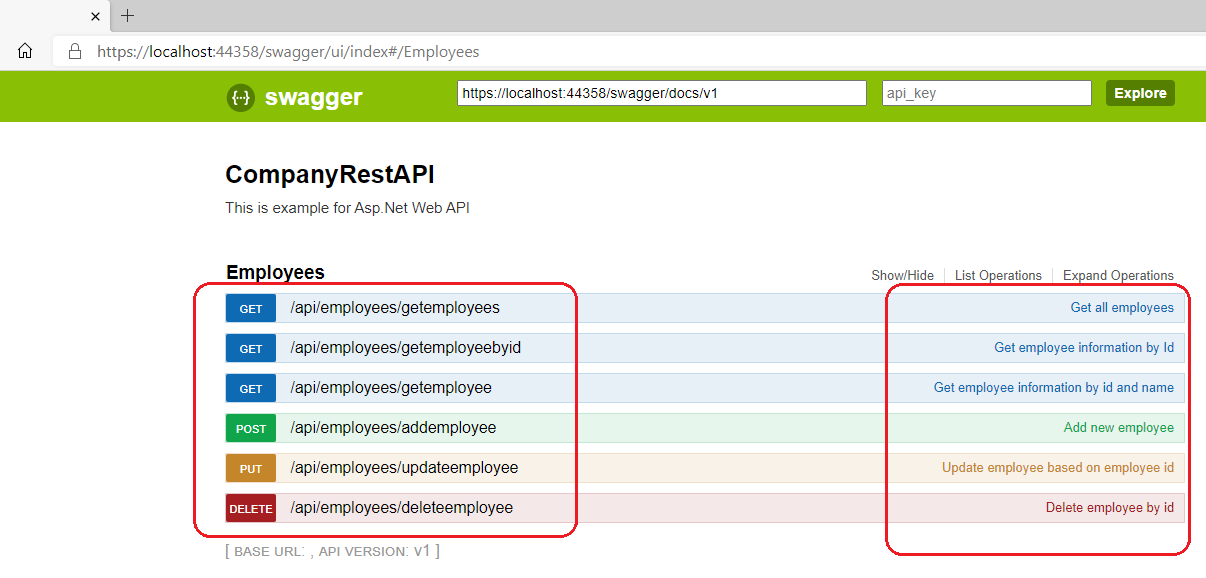
On the left side, we have Employees controller methods and right side we have XML comments, which we added for each method.
We can also invoke the Asp.Net Web API method on Swagger UI. Select the first API method, getemployees. It displays the window, as shown below.
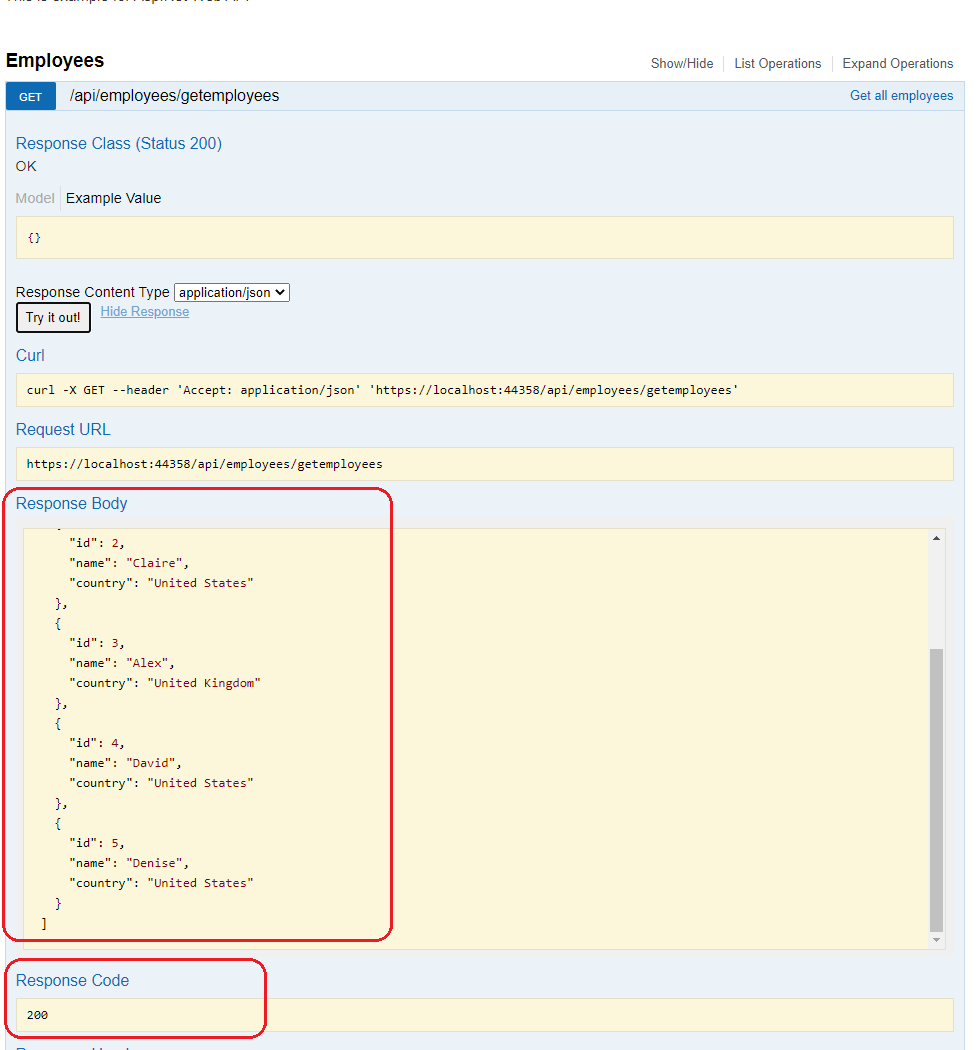
Click on “Try it out!” button; it displays all employee’s information as shown below under Response Body with stats code as 200 (HttpStatusCode.OK).
Let’s try to invoke the addemployee method by entering the details, as shown below.
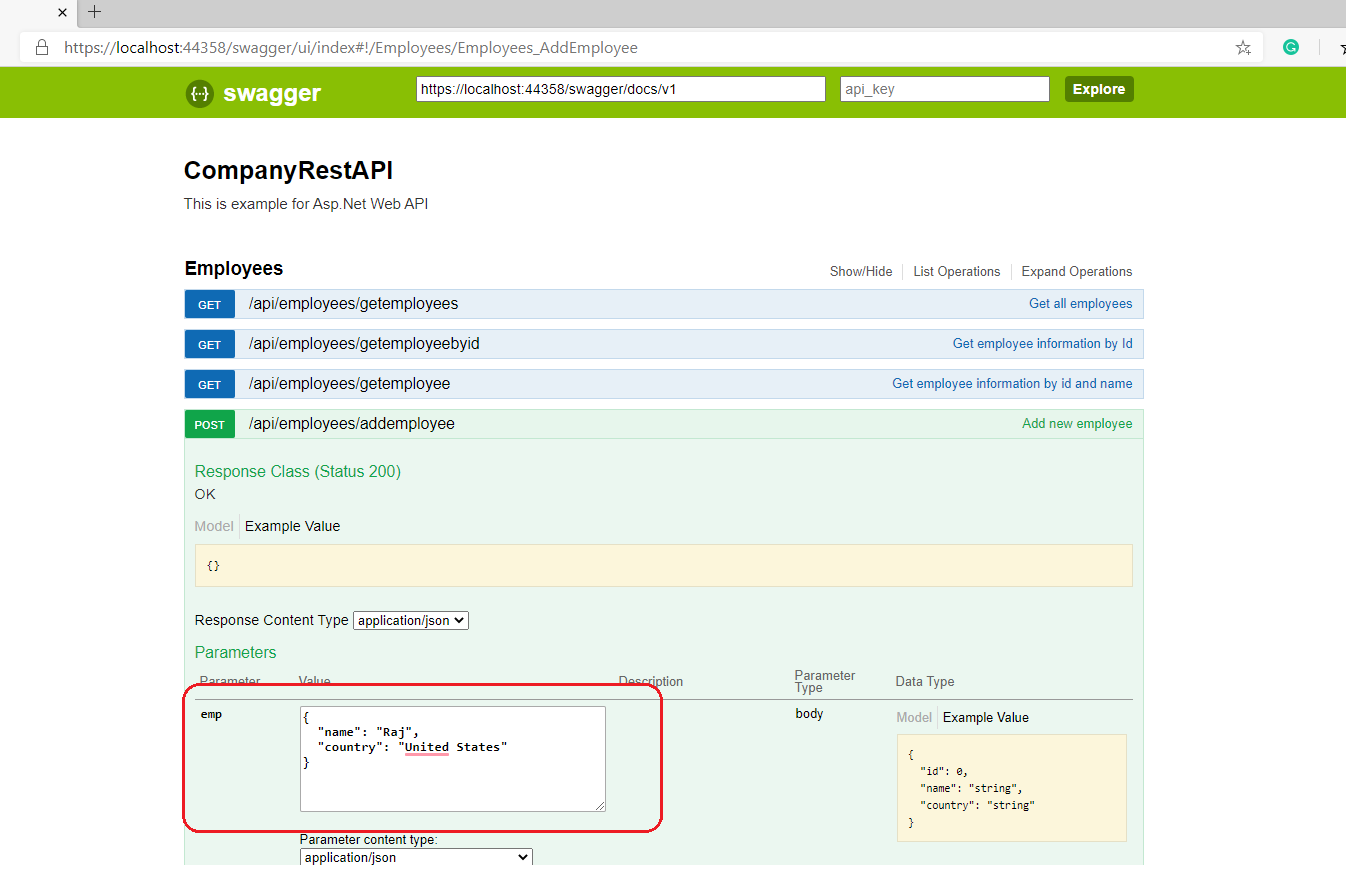
As shown above, on the right side, it displays input format in JSON. Enter new employee information on the left side as highlighted and click on “Try it out!” button. It displays the output, as shown below.
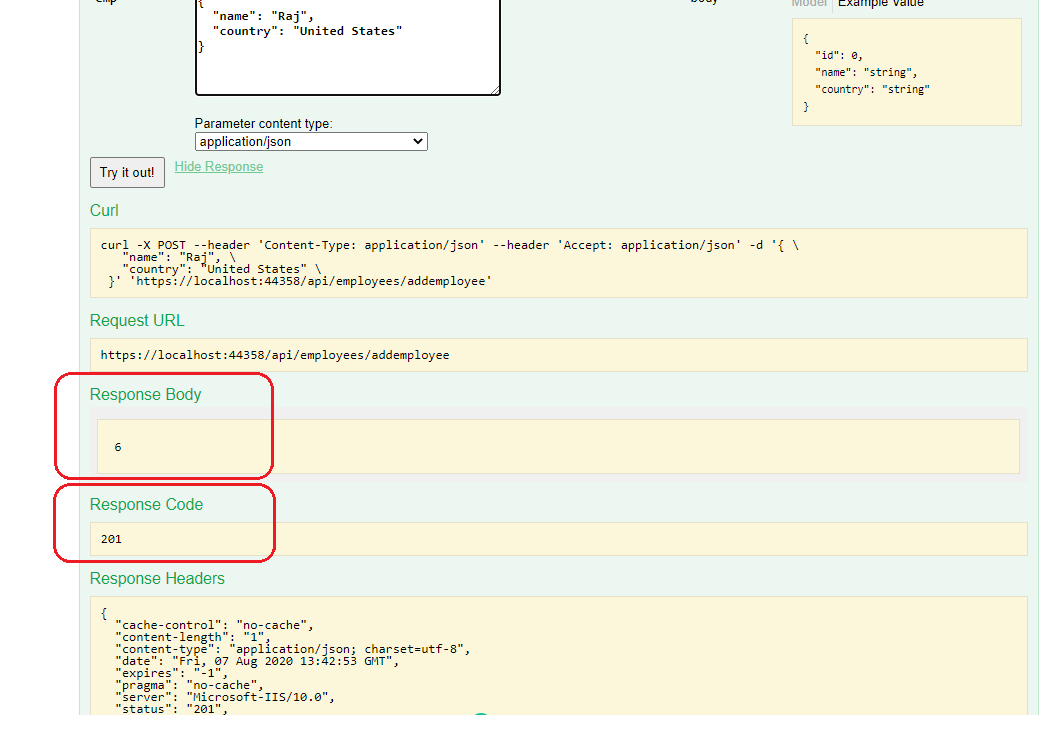
Addemployee API method returns the response body as 6 (new employee id) and response code as 201 (HttpStatusCode.Created). In the same way, we can invoke other API methods also.
