Validations in ASP.NET MVC Application
In Asp.Net MVC applications validations added domain level instead of form level. That means validations added for Model class instead of adding at View level, this helps maintaining validations at application level. For example if you add the validations for particular Model class, these validations will apply where ever you use this particular Model class. Use System.ComponentModel.DataAnnotations namespace to add the validations at Model class level. Today we discuss about how to validations to Asp.Net MVC application.
Lets create an example with simple data entry form.
Open Microsoft Visual Studio 2013 => Create new Asp.Net MVC 4 Application and name it as MVCValidations.
Add Home Controller to Controllers folder and add Registration model class to Models folder as shown below. Add validations to model class by using attributes in the System.ComponentModel.DataAnnotations namespace.
Registration Model class:
using System.ComponentModel.DataAnnotations;
namespace MVCValidations.Models
{
public class Registration
{
[Required(ErrorMessage = "Please enter Name")]
public string Name { get; set; }
[Required(ErrorMessage = "Please enter Email")]
public string Email { get; set; }
[Required(ErrorMessage = "Please enter Location")]
public string Location { get; set; }
}
}
As shown above we are using Required attribute to add the validation rule for each property. So whenever you use this model class the validation rules will apply automatically. Add strongly typed view for the HomeController Index() action results method with the Registration model class.
@model MVCValidations.Models.Registration
@{
Layout = null;
}
<!DOCTYPE html>
<html>
<head>
<meta name="viewport" content="width=device-width"/>
<title>Index</title>
<style type="text/css">
.field-validation-error {
color: #f00;
}
.field-validation-valid {
display: none;
}
.input-validation-error {
border: 1pxsolid#f00;
background-color: #fee;
}
.validation-summary-errors {
font-weight: bold;
color: #f00;
}
.validation-summary-valid {
display: none;
}
</style>
</head>
<body>
<div>
@using (Html.BeginForm())
{
@Html.ValidationSummary()
<p>Name: @Html.TextBoxFor(n => n.Name) </p>
<p>Email: @Html.TextBoxFor(n => n.Email) </p>
<p>Location: @Html.TextBoxFor(n => n.Location) </p>
<input type="submit" value="Register"/>
}
</div>
</body>
</html>
As shown above we are using the ValidationSummary() method of Html libraries which displays the summary of error messages. We added some CSS classes field-validation-error, field-validation-valid, input-validation-error, validation-validation-errors and validation-validation-valid. Whenever there is no data for Name textbox it renders as <input class="input-validation-error" data-val="true" data-val-required="Please enter Name" id="Name" name="Name" type="text" value="" />, so we can add style to input-validation-error CSS class to highlight the field. If there are no validation errors it will contain this error CSS class. In the same way we added styles for validation summary also.
Lets add ActionResult method to Home controller with HttpPost attribute as shown below.
using MVCValidations.Models;
using System.Web.Mvc;
namespace MVCValidations.Controllers
{
public class HomeController : Controller
{
//
// GET: /Home/
public ActionResult Index()
{
return View();
}
[HttpPost]
public ViewResult Index(Registration oRegister)
{
if (ModelState.IsValid)
{
//No Validation error, go to Thanks page
return View("Thanks", oRegister);
}
else
{
// there is a validation error
return View();
}
}
}
}
As shown above we are using ModelState.IsValid property to check whether any validation errors are there or not. If it is true we are redirecting to Thanks view otherwise redirecting to same view to display the validation messages.
Run the application and click on Register button without entering the data, it displays the validations as shown below.
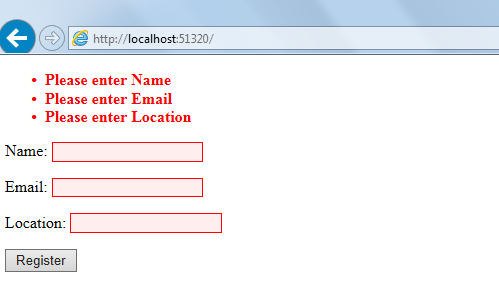
Now enter all fields and click on Register button, it redirects to Thanks view. Here we discussed about only empty validations means just checking whether particular field contains data or not. We can add further validations to check Email, date....etc to validate entered data is valid or not.
